Bear Creek Lake Park

Round-Trip Length:  3.64 miles
Start Elevation:  5,766’
High Point:  6,664’
Elevation Change:  204’
Skill Level:  Easy
Trailhead Location:   East of C470 at Morrison Road and S. Indiana Street (not the official park entrance).  Park along the shoulder of Morrison Road and S. Indiana Street.  The trail is on the south side of the road.

We decided to get out on this nice day and explore a trail close to home.  We were hoping this trail would not be too crowded and it wasn’t. Bear Creek Lake Park is a 2,624-acre park with 15 miles of multi-use trails.

We headed south along the Ward Canal.  Views to the west of the foothills.

P1720679 (2)

P1720680e

A view looking back up from the direction we had come.

P1720682e

We continued on down to the shore of Bear Creek Lake.

P1720683e

P1720684 (2)

A view looking across the lake to Mt. Carbon.

P1720686 (2)

From Bear Lake, we continued to the west on the Mt. Carbon Loop Trail which heads through the trees along Bear Creek.

P1720687 (2)

P1720689 (2)

P1720695 (2)

P1720692 (2)

A view looking to the west.

P1720690 (2)

We followed the Mt. Carbon Loop trail as far as Muskrat Meadows picnic area and then turned around and headed back east to the Whitetail picnic area.  At Whitetail we headed north on the North Park Trail.

P1720697 (2)

We continued north until we reached the Ward Canal.  A view as we approached the crest of the hill before reaching the canal.

P1720699 (2)

We followed the trail east along the canal.  We continued hiking east along the canal and then continued following the canal north back to Morrison Road where we had parked.

P1720701 (2)

A great Spring hike!  The map of our route.

Bear_Creek_Map

Eldorado Canyon – Rattlesnake Gulch

Round-Trip Length:  3.55 miles
Start-End Elevation:  6,243′ – 7,001
Elevation Change:  +792’
Skill Level:  Easy
Trailhead Location:  The Eldorado Canyon State Park entrance station is located 3.1 miles west of Highway 119 on Eldorado Springs Road. Use the self-serve pay station if no attendant is on duty. The Rattlesnake Gulch Trailhead is located .7 west of the pay station on the left (south) side of the road. Parking is limited at the trailhead. Additional parking is available in designated areas along the main access road.

Several weeks ago we hiked the Rattlesnake Gulch trail in Eldorado Canyon State Park.  It had been quite a few years since we had hiked here.  This was a good early season hike. We headed up the Fowler Trail for a short distance and then took a right onto the Rattlesnake Gulch trail.  The trail takes you up above the canyon with great views of the canyon walls.  Jagged Cadillac formations along the southeast wall are named so for their resemblance to 1950s car fins.

IMG_5998 (2)

IMG_5960e

After 1.2 miles, we came to the site of the old Crags Hotel.

IMG_2741 (2)

The hotel was only in operation for four years (1908 – 1912) before it burned down.  In 1908, for $1.00 you could buy a round-trip ticket on the Moffat Railroad from Denver to the Crags Hotel.   It was quite the luxurious hotel in it’s short lived days.  The ruins of the main fireplace.

IMG_5966 (2)

Ruins of where the big fountains was at the entrance.

IMG_2746 (2)

IMG_2753 (2)

There were nice views of the canyon from the hotel site.

IMG_5969e

IMG_5973e (2)

IMG_2759e

We continued up the trail.

IMG_5975 (2)

A view looking to the east.

IMG_5984e

After another 0.3 miles, we came to the Continental Divide overlook which great views of the snow covered peaks.

IMG_5979e

IMG_5977e (2)

After taking in the views, we headed back down the trail.  The trail can be done as a loop when the upper half of the Rattlesnake Gulch trail is open.  However, it was currently closed through July 15 to protect nesting golden eagles in the area.

We continued back down to the bottom of the canyon.  The map of our route.

Eldorado Canyon

We stopped to take some pictures along the South Boulder Creek.

IMG_6007e2

Eldorado Canyon is a great climbing area and we did see quite a few climbers enjoying the afternoon.

IMG_6010 (2)


North Table Mountain

Round-Trip Length:  3.35 miles
Start-End Elevation:  6,031′ – 6,510′
Elevation Change:  +515’
Skill Level:  Easy
Trailhead Location:  North Table Mountain Park is located on the east side of Highway 93 in Golden, Colorado. The parking area is located on the north side of town, just north of Pine Ridge Road.

We wanted to get out for a short hike on Saturday morning with some friends before they needed to leave town.  We decided on the North Table – Tilting Mesa – Mesa Top Loop.  This is a short hike close to town with some great views.  It had snowed several inches over night so we weren’t sure what the trail conditions would be like.

I was surprised when we got to the trailhead to find the parking lot full!  Apparently a lot of others decided to get out on a sunny Saturday morning after the snowfall as well.  Despite the parking lot being full, the trail was not crowded which was nice.

The majority of the elevation gain (423′ of the 515′ of total gain) comes in the first 0.5 miles.  Heading up the wide North Table Loop trail to the top of the mesa.

Looking back down the trail.

A view of the snow covered rocks along the trail.

At the top of the mesa is an area called the Sea Cliffs.  This is a climbing area.

We merged onto the Tilting Mesa trail and continued our hike across the prairie mesa top.  Looking back to the southwest along the trail.

A shot of Lichen Peak, the high point on the mesa.

A view to the west.

We continued along the Tilting Mesa trail.  We had views to the east of downtown Denver.  The trail continues north across the mesa and turns into the Mesa Top trail.  A couple of more views along the trail including a yucca plant.

We begin our descent off of the mesa top.

Back at the mesa base we turned to the south to make our way back to the trail head parking.

After 3.2 miles we arrived back at the trail head.  Our trail route for the day.

A great short hike close to town with some nice views!

Jones Pass Snowshoe

Round-Trip Length:  4.69 miles
Start-End Elevation:  10,425′ – 11,701′
Elevation Change:  +1,276’
Skill Level:  Moderate
Trailhead Location:  From Denver, take I-70 west to the Empire exit.  Take US 40 towards Winter Park.  As the road makes it’s first swooping right hand turn before heading up to Berthoud, turn left off of US-40, and follow signs to the Jones Pass parking lot.

I had been wanting to snowshoe in the Jones Pass area for quite some time.  It is a relatively easy snowshoe with spectacular views once above treeline.  The one downside to this trail is that snowmobiles are allowed in this area so we did have to deal with those on the trail but the views in the open bowl above treeline were worth it!

We had a beautiful bluebird sky day for our trip.  A view through the trees a short distance up the trail.

The trail is actually the Jones Pass road so it is quite wide and packed from snowmobile travel.

After about 1 mile we came out of the trees for a view up the valley.

We continued on up the road and after about another mile, we got to tree line with views of the bowls beneath Jones Pass.  What beautiful views!

We could see a couple of skiers ahead heading up the bowl.

We decided to continue up the bowl ourselves not sure exactly how far we could go but at least getting up a little higher to take in the views.

A couple of other skiers heading up off to our right.

Looking higher up the bowl.  We thought about heading up and to the saddle to the right but the wind had picked up some so we decided to turn around here and head back down.

Another view straight ahead before turning around.

Looking back down the valley as we turned around to head back down.

The full view looking up to the right and back down to the left.

Heading back down.

Our route.

We couldn’t have asked for a better day in the High Country!


Arapaho Glacier Trail

Round-Trip Length:  11.1 miles
Start-End Elevation:  9,981′ – 12,577′
Elevation Change:  +2,731’
Skill Level:  Difficult
Trailhead Location:  The Arapaho Glacier Trailhead starts at the Rainbow Lakes Trailhead.  The trailhead  is located 5 miles west of Highway 72 on Rainbow Lakes Road (a.k.a. County Road 116 – National Forest System Road 298). Rainbow Lakes Road is located 7.35 miles north of Nederland, CO. Turn west from Highway 72 on Rainbow Lakes Road and keep straight past the University of Colorado Mountain Research Station access road and Caribou 4WD turnoff, through the Rainbow Lakes Campground to the small parking area at the road’s terminus at the trailhead.

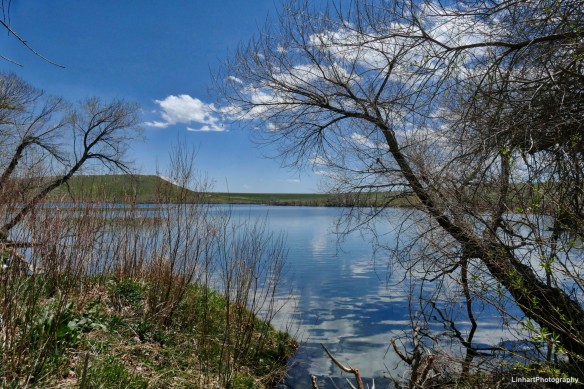
I had been wanting to hike this trail for a couple of years.  A few weeks ago some friends and I attempted the hike from the north starting at the 4th of July Trailhead.  However, the weather did not cooperate that day and we had to turn around a little over 3 miles into the hike as it was pouring rain.  This time I started from the south side at the Rainbow Lakes trailhead.  The trail takes you up above treeline with great views into the Boulder watershed including Silver, Island, and Goose lakes.

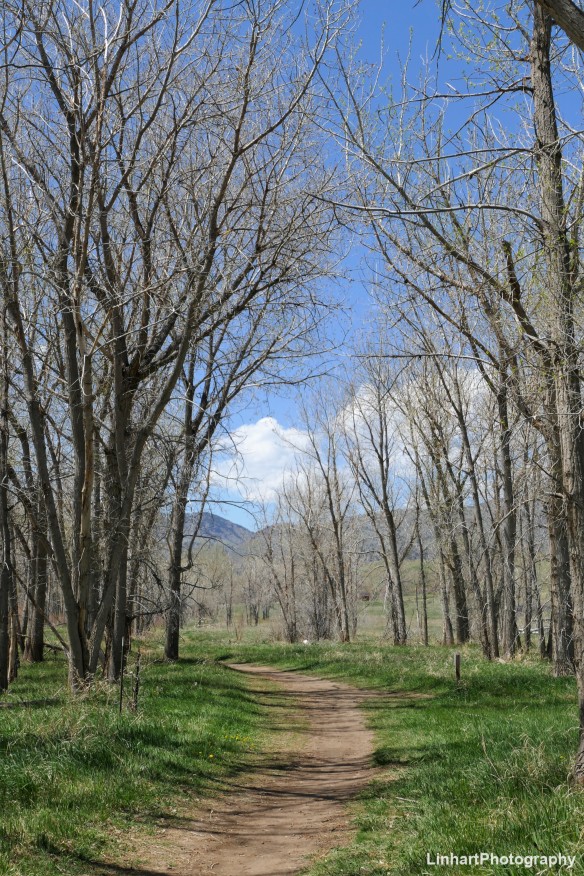
The start of the hike.

IMG_4758 (2)

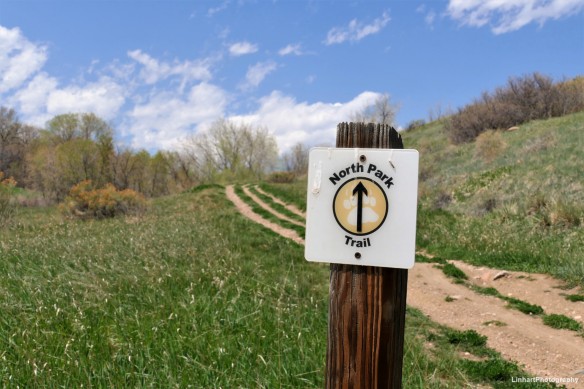
In a quarter of a mile, I took a right onto the Arapaho Glacier Trail.

IMG_4759 (2)

Taking a left at this junction will take you to Rainbow Lakes.  You can read about the Rainbow Lakes here here.

Shortly after the trail junction, I entered into the Indian Peaks Wilderness.

IMG_4760 (2)

The first two miles of the Arapaho Glacier trail take you up through the trees on a fairly mellow trail.  The trail then comes out of the trees into the open tundra.  My first views looking back to the east and the sea of clouds I was to the west of and above.

IMG_4774e

IMG_4790 (2)

I continued on up the tundra with views of the Indian Peaks.

IMG_4767e

Soon I got a great view of Silver Lake and Island Lake down below.

IMG_4769e

This series of Lakes (Silver, Island, and Goose lakes) are a part of the Boulder watershed and are off limits to the public.  In 1929 the U.S. Congress deeded most of the land in the Silver Lake Watershed to the City of Boulder specifically for water supply purposes. The watershed contains 13 reservoirs and natural lakes that are fed by snowmelt and the melting of Arapahoe Glacier. This high-quality water supply was sufficient to meet all of Boulder’s water needs until the 1950s. Today about 40% of the city’s water supply is derived from the Boulder watershed basin. In order to protect water quality and to preserve the fragile alpine environment, the Boulder Watershed is closed to public access.

A view looking up the valley towards Goose and Triple Lakes.

IMG_4771e

Looking back to the southeast to Rainbow Lakes.

IMG_4781 (2)

IMG_4777e

A look even further to the southeast at Barker Reservoir in Nederland.

IMG_4782 (2)

A backpacker heading across the tundra.

IMG_4778e

A small tarn up to the northwest.

IMG_4784e

The trail continued up across the tundra, making large switchbacks.  It was quite windy and cold up here but at least it was sunny.  At 4.4 miles I reached the saddle where I could get views back to the south and west.

IMG_4787e

I continued on up past the saddle to the west and headed up.  At 5.5 miles I finally decided to turn around.  From what I could tell, I was almost to the point we had hiked up from the 4th of July Trailhead a few weeks earlier.

Heading back, I took in more views of the lakes.  A look back down onto Island Lake.

IMG_4797E

A panoramic view of all of the lakes.

IMG_4125e

And, a shot of myself.

IMG_4126e

I continued on back down the trail.  I was pretty tired by the time I reached the car.  It had been a while since I had been on an 11-mile hike and add to that over 2,700′ of elevation gain, it was quite a workout for the day.

My route:

Arapaho Glacier Map


Sprague Lake

Round-Trip Length:  0.8 miles
Start-End Elevation:  8,720 – 8,720′
Elevation Change:  +10′
Skill Level: Easy
Trailhead Location: Sprague Lake is located just south of Bear Lake Road on the east side of Rocky Mountain National Park.

A quick little nature walk around Sprague Lake in Rocky Mountain National Park.  This walk is usually good for some reflection shots in the lake.  We always seem to be here in the afternoon and get reflection shots looking to the east but not to the west.  We’ll have to come sometime early in the morning when the waters are calmer to get the reflection of  Hallett Peak(12,713′), Otis Peak (12,486′) and Taylor Peak (13,153′).  By afternoon, even a small breeze will not yield any reflections.

IMG_4063e

However, looking to the east, we were able to get a few reflections.

IMG_3835e

IMG_4081e

IMG_0373e

We came across some ducks taking in the afternoon sun.

IMG_0351e

And, or course, a few wildflowers.

IMG_0371 (2)

There were a few large clouds moving in which made for some nice shots.

IMG_4080e

IMG_4088e

Sprague Lake Map


Lily Pad Lake

Round-Trip Length:  4.1 miles
Start-End Elevation:  9,827 – 10,014′
Elevation Change:  +439′
Skill Level: Easy
Trailhead Location:  3.6 miles west of Silverthorne, Colorado on Wildernest Road.  From I-70, exit #205 at Silverthorne and travel north on HWY 9 to the first traffic light, which is Wildernest Road. Turn west on Wildernest Road, which turns into Ryan Gulch Road. Continue on Ryan Gulch Road up the winding hill past numerous condo complexes. At the top of the hill there is a parking area on the left. The Lily Pad Lake Trail begins at the south end of the parking area. A 2nd trailhead, 50 yards north of this parking area, leads to Buffalo Mountain.

We have hiked up to this lake many times over the years but realized I have never written a blog about it.  This is a very easy hike in Summit County and a good “go to” hike to get out and enjoy the outdoors.  We took this hike back in August.  We didn’t take any pictures on the way up until we reached the first pond/lake next to Lily Pad Lake.  This small lake was covered in lily pads.  We had missed seeing them blooming.

IMG_4107e

I did find one bloom on the lake.

IMG_4127 (2)

We arrived at the larger Lily Pad Lake and sat to take in the views and have a snack.

IMG_4117e

IMG_4111 (2)

Some chipmunks checking us out while we were having our snack.

IMG_4116 (2)

IMG_4113 (2)

IMG_4112 (2)

IMG_0417e

We took a walk around the lake to capture some more great views.

IMG_4124e

IMG_4122e

We headed back down the trail towards the trailhead.

IMG_4155e

We were quite surprised to come across a moose just off the trail!  We have never seen moose in this area before.

IMG_4147e

IMG_4146e

IMG_4134 (2)

IMG_4149 (2)

A great view of Dillon Lake as we approached the end of the trail.

IMG_4157e

The map of our route.

Lily Pad Lake Map

Time to head on for our drive up Shrine Pass to enjoy the rest of our day in the mountains.


Chinns and Sherwin Lakes

Round-Trip Length:  4.2 miles
Start-End Elevation:  9,748 – 11,109′
Elevation Change:  +1,361′
Skill Level:  Moderate
Trailhead Location:   Interstate 70 west from Denver. Take exit 238, Fall River Road. Turn right on Fall River Road and drive 6.5 miles to CR 274 (dirt). Left on CR 274 for 1.6 miles to small parking area.

We did this hike for the first time about 6 years ago in November.  You can read about that hike here.  We thought it would be nice to do the hike in the summer so we did the hike again at the end of August.  We headed up CR 274 and drove up the dirt road 1.6 miles and parked off the road where we did last time.  There is private land along this road with many “No Parking” signs but this parking area is not marked as such.  We parked and headed up the road.  A short ways up a guy on a four wheeler came up and asked where we parked.  I told him and he said it was private property all along this road and that the sign at the beginning of the road states that there is no parking for 2.5 miles up the road.  He said he just wanted to warn us because he would hate for us to get towed.  He then continued on his way.  We debated what to do, turned around and headed back towards the car.  However, we weren’t sure where else we would park.  We had parked is this parking area before without a problem and there were other cars parked there today so, in the end, we decided to leave the car and continue our hike anyway.  When we finished our hike and drove back out to the highway, there was no sign that said parking was not allowed for the next 2.5 miles up the road as the guy had told us.  So, not sure why he told us that.

Heading up the trail/road.

IMG_4283e

After 1.8 miles, we arrived at Chinns Lake.  The water level was quite low.

IMG_3959e

IMG_4284e

IMG_4287e

We always like taking shots through the old cabin windows.

IMG_4291e

There was some fire weed in bloom which added some color.

IMG_4295e

We continued around the left side of the lake and headed up to Sherwin Lake a short distance up.  This lake is referenced as both Sherwin Lake and Upper Chinns Lake.  This lake was also quite low.

IMG_4301 (2)

IMG_4306e

A look back down on Chinns Lake.

IMG_4308e

We headed back towards Chinns Lake.  Some more shots of fire weed.

IMG_4312e

IMG_4314e

We headed back down the trail to the car.  We were relieved to find that our car was still there and did not get towed.  I still believe that where we parked was not private and we were OK to park there.

Our route:

Chinns Lake Map


Crystal Lake

Round-Trip Length:  2.8 miles
Start-End Elevation:  11,539′ – 11,735′
Elevation Change:  +309’
Skill Level:  Easy
Trailhead Location:   Drive on Colorado 9 to Hoosier Pass, between Breckenridge on the north and Fairplay to the south.  Park on the west side of the pass in the large area behind the Hoosier Pass sign.

We took one last hike on Labor Day before heading back home after the long weekend.  This was another new hike for us.  We ended the weekend with a short hike off of Hoosier Pass to Crystal Lake.  The hike follows an old mining road up to the lake.  A view of Quandary Peak (14,265′) from the trail/road.

IMG_4467e

IMG_0733e

After a fairly easy 1.4 mile walk up the old mining road, we arrived at the shore of Crystal Lake.  You can see some mine tailings across the lake.

IMG_4019e

We continued around the right side of the lake to get views looking back to the east across the lake.

IMG_4020e

IMG_0724e

IMG_0721e

IMG_4456e

We hiked up just a little higher to the mine ruins to look back down on the lake.

IMG_4454e

A view looking southeast as we head back down the trail.

IMG_4468e

The weather held out again today and it just started to rain as we got back to the car.

Our route:

Crystal Lake Map


Windsor Lake

Round-Trip Length:  4.13 miles
Start-End Elevation:  10,790′ – 11,638′
Elevation Change:  +990’
Skill Level:  Easy
Trailhead Location:   From the south side of Turquoise Lake, west of Leadville, drive on the bumpy, dirt road toward Hagerman Pass for 3.7 miles from the pave road around the lake.  Park on the right, at the sign for Windsor Lake parking.  Regular cars can reach this point.

Over Labor Day weekend we were excited to hike a new trail in the Leadville area.  We were fortunate that the weather held up.  We drove down to Leadville and Turquoise Lake and headed up the Hagerman Pass road.  The road was in better condition that what I had expected.  We started out on our hike a little after 10am.

IMG_4430 (2)

A shot from the parking lot.  It was looking like the weather was going to hold up for the hike.

IMG_4393e

A short distance up the trail we came to a junction.  We continued on in the direction of Windsor Lake.

IMG_0590

We continued up the trail as it became a fairly steep climb.  We stopped for a break at a great viewpoint.

IMG_4395e

Looking back down the valley.

IMG_4397 (2)

About halfway up we came across a small cave.

IMG_4429

IMG_3996e

A few flowers along the trail.

IMG_0592 (2)

IMG_8097 (2)

IMG_8096 (2)

IMG_0616 (2)

Along with the flowers, some interesting moss on the rocks.

IMG_8079 (2)

An interesting rock we saw along the way.  It looks as if the white quartz was placed in a line in the middle of this boulder.

IMG_8092 (2)

IMG_8093 (2)

We arrived at a small unnamed lake prior to getting to Windsor Lake.

IMG_4398e

We continued on up the trail and soon arrived at Windsor Lake.

IMG_3999e

IMG_4002e

We had a lunch break here and continued to take in the views.

IMG_4009e

IMG_4010e

IMG_4416e

IMG_4409e

IMG_4405e

IMG_4400e

We headed back down the trail.  A look down on the lower unnamed lake as we headed back.

IMG_4417e (2)

The ground cover turning color for Fall.

IMG_0602e

IMG_4424e

Interesting view of the inside of a small pine cone.  I did not know that’s what it looked like inside of the center of a pine cone!

IMG_8101 (2)

A shot of some fireweed back at the trailhead.

IMG_8105e

Our route:

Windsor Lake Map